
Is there information or instructions on how to use this feature? I believe I need to adjust my Z scale just a small amount and I think this may be the ticket. I would like to read up on it before I start changing things around.
Thanks,
-Ben
Contour Scale adjustment
-
mongerdesigns

- Solus Guru
- Posts:1950
- Joined:Sat Apr 25, 2015 5:16 pm
- Location:Los Angeles
- Contact:
Re: Contour Scale adjustment
It's very simple.
Let's say you're printing a 10mm x 10mm x 10mm model.
Once you print it out, you can measure what actually printed. For example you got 10.2mm x 10.4mm x 10.8mm instead.
Then you just enter those original values under Original Scale, and what you got after printing under Actual Scale.
The software will then use that information to automatically compensate for other prints.
This feature is still under development and is being beta tested. Let us know how well it works for you.
Let's say you're printing a 10mm x 10mm x 10mm model.
Once you print it out, you can measure what actually printed. For example you got 10.2mm x 10.4mm x 10.8mm instead.
Then you just enter those original values under Original Scale, and what you got after printing under Actual Scale.
- scale-adjustment.jpg (25.38KiB)Viewed 11656 times
The software will then use that information to automatically compensate for other prints.
This feature is still under development and is being beta tested. Let us know how well it works for you.
Monger Designs a.k.a. Monger
http://www.mongerdesigns.com
Junction3d - Official US Distributor for the SOLUS 3D PRINTER
http://www.junction3d.com
Follow us on Instagram!
https://www.instagram.com/junction3d/
http://www.mongerdesigns.com
Junction3d - Official US Distributor for the SOLUS 3D PRINTER
http://www.junction3d.com
Follow us on Instagram!
https://www.instagram.com/junction3d/

Re: Contour Scale adjustment
mongerdesigns wrote:It's very simple.
Let's say you're printing a 10mm x 10mm x 10mm model.
Once you print it out, you can measure what actually printed. For example you got 10.2mm x 10.4mm x 10.8mm instead.
Then you just enter those original values under Original Scale, and what you got after printing under Actual Scale.
scale-adjustment.jpg
The software will then use that information to automatically compensate for other prints.
This feature is still under development and is being beta tested. Let us know how well it works for you.
This is a very handy feature. Makes calibration a lot easier.
Re: Contour Scale adjustment

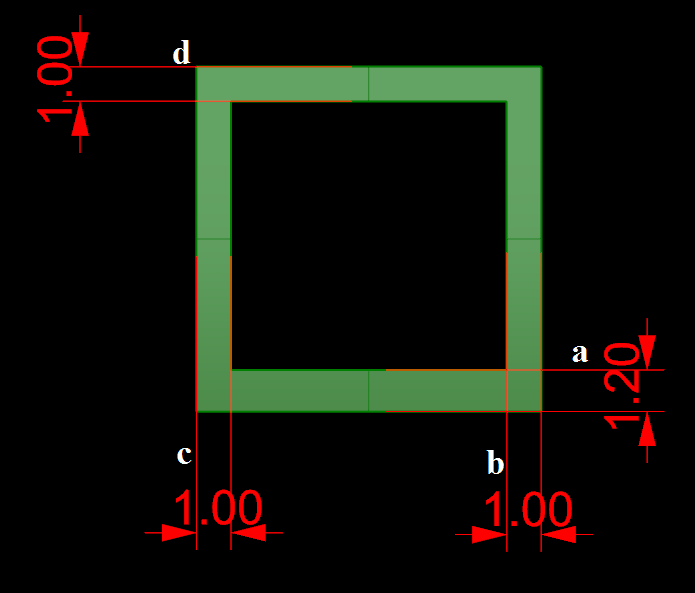
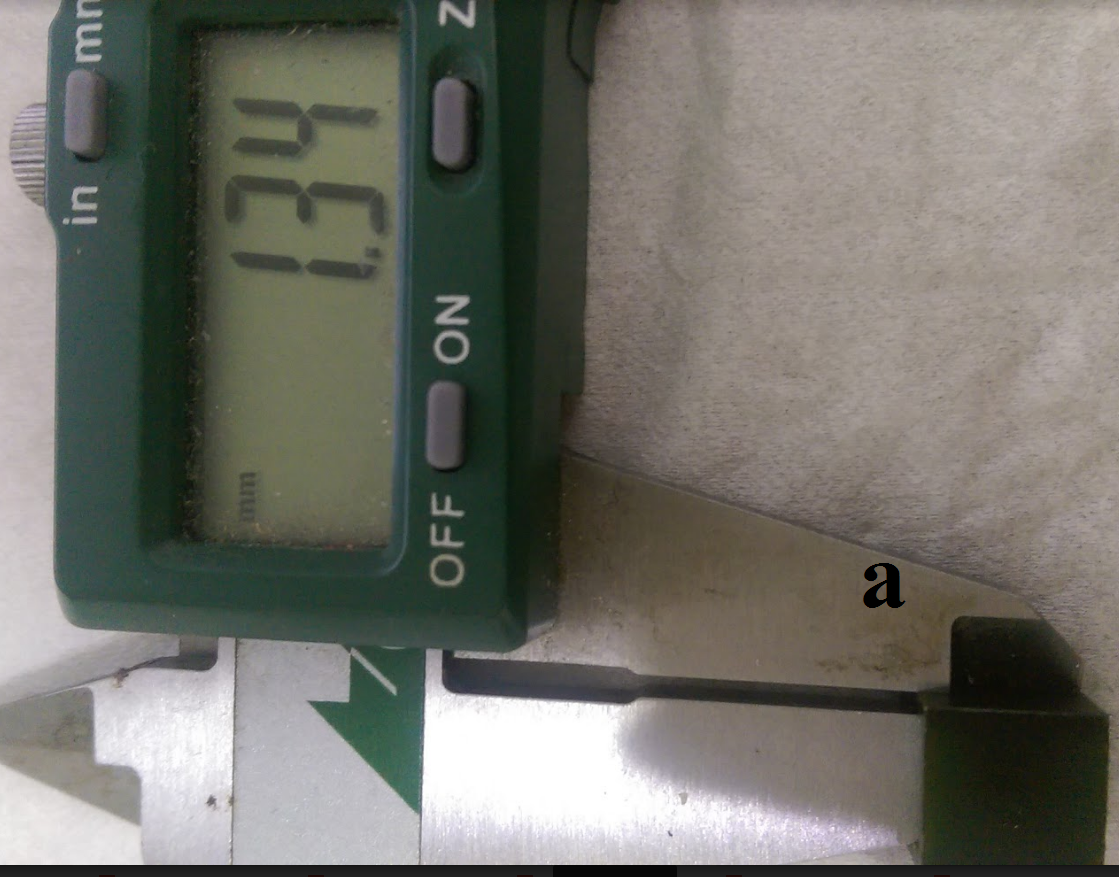
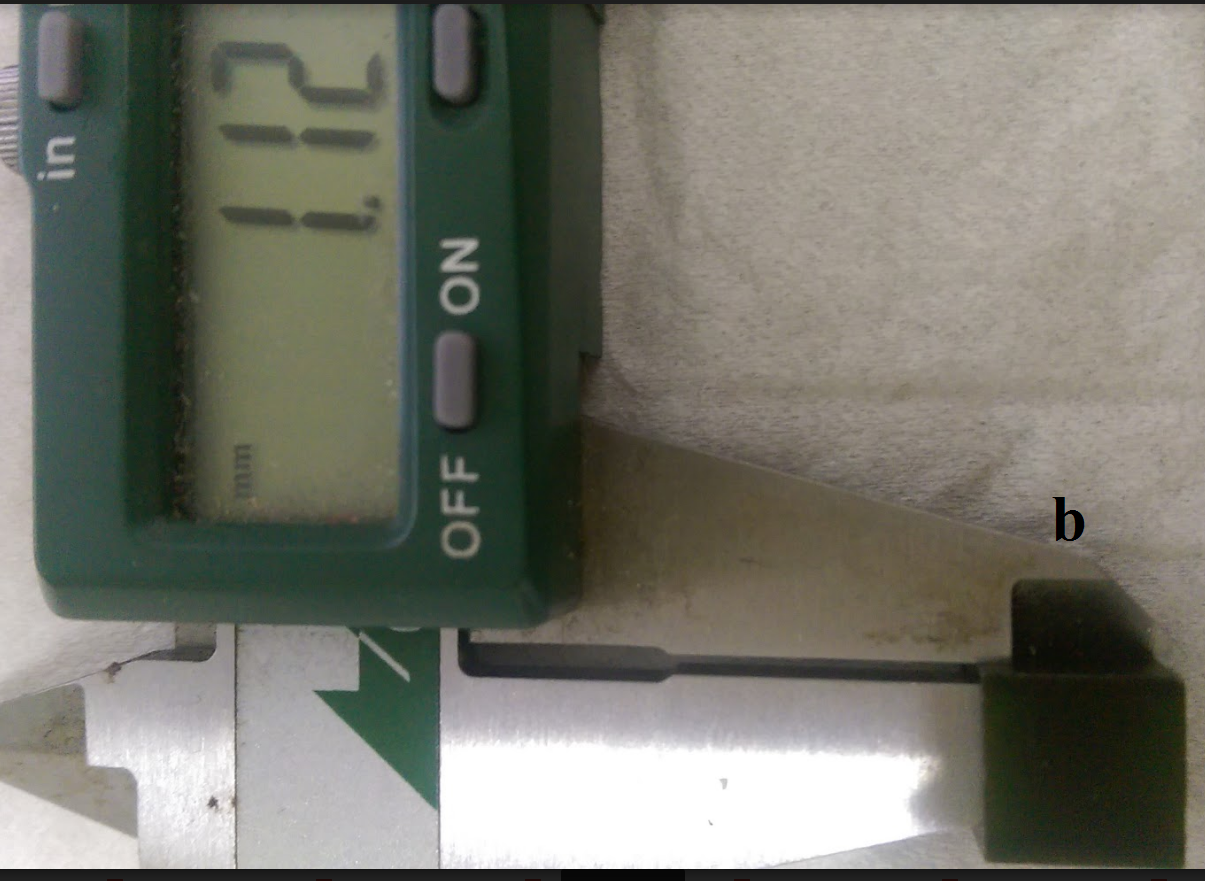

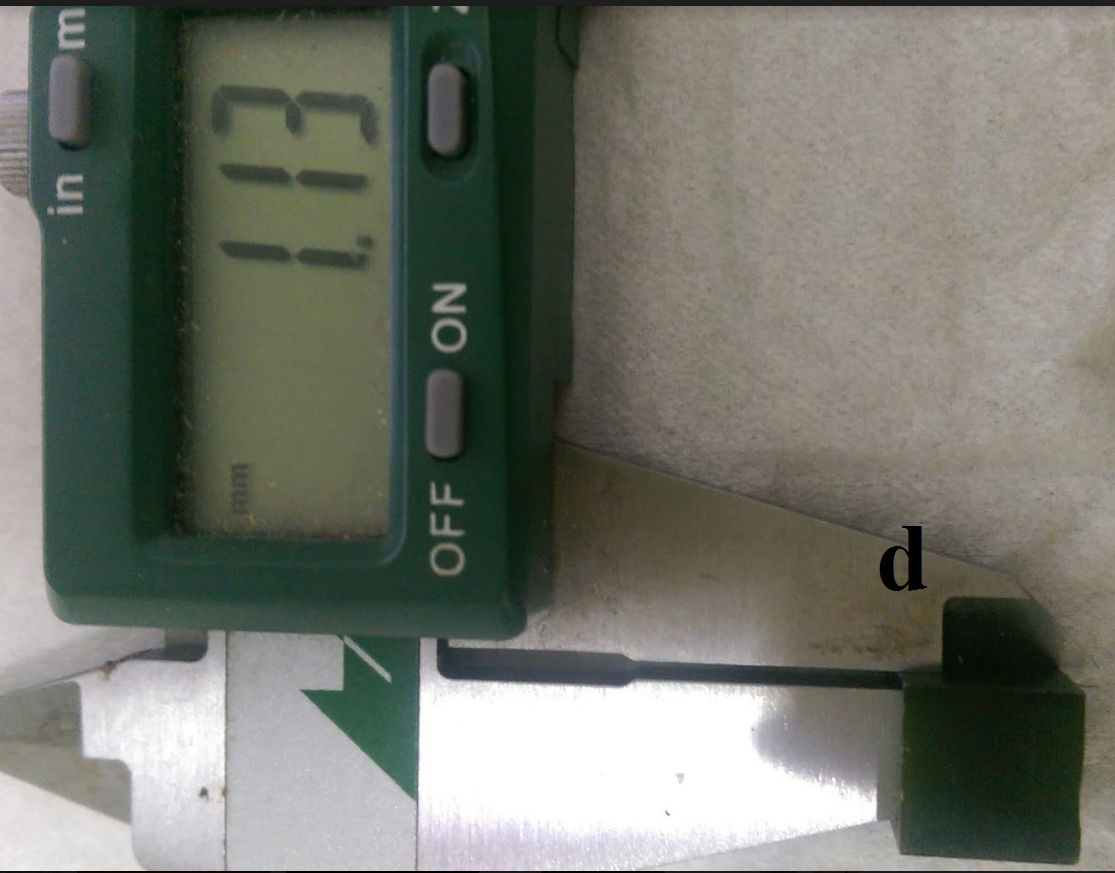
What I have to do ? . While the value of x, y, z decreases. But a, b, c, d, increased
Can you help me ?

Re: Contour Scale adjustment
Which resin is that?
Seems like your exposure time is too high, your focus is off or you haven't added enough pigment.
Seems like your exposure time is too high, your focus is off or you haven't added enough pigment.
Re: Contour Scale adjustment
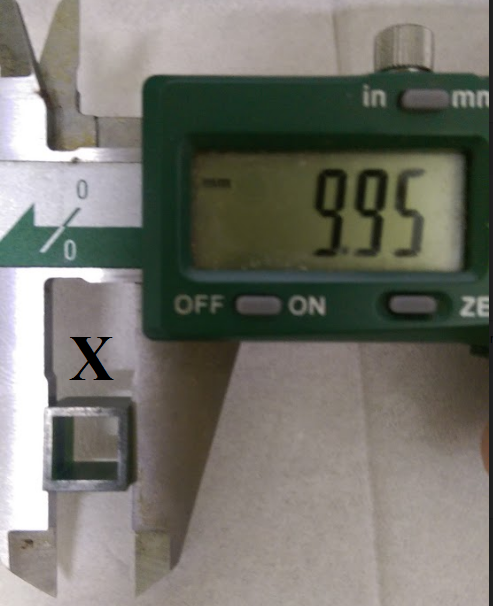
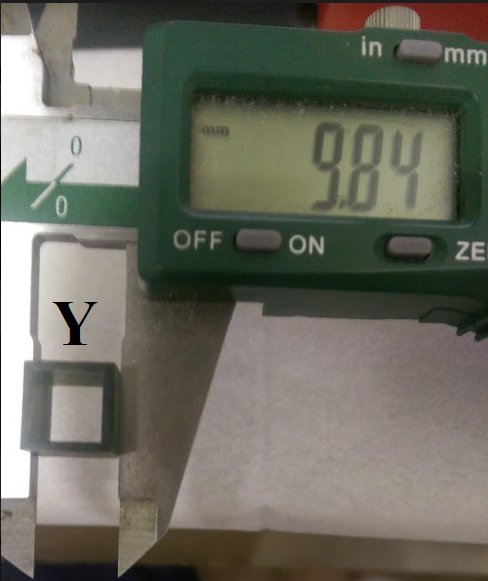
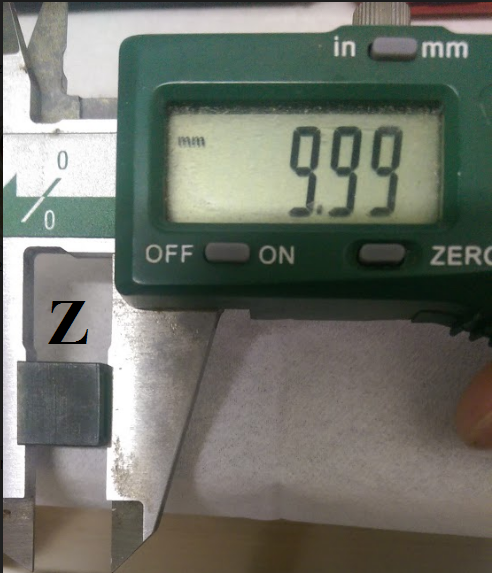
Should I be adjusting the scale or the distortion params to account for these variances? The indicated measurements are the averages of the blocks in each row. The blocks are all supposed to be 10mm x 10mm.
- Attachments
-
-
mongerdesigns
- Solus Guru
- Posts:1950
- Joined:Sat Apr 25, 2015 5:16 pm
- Location:Los Angeles
- Contact:
Re: Contour Scale adjustment
Kristy,
There is an easy way to test if your projection slices have the correct measurements even before the printing starts.
Click on View/Slice Preview. Since you have a cube, it doesn't matter which slice you look at.
Then make sure the resin tank and build platform are removed, and that a piece of paper is placed on the quartz.
Check the little 'Project' checkbox on the left and it will start projecting those slices on the paper. Measure the slices.
If you get 10x10 then the shrinkage happens from the resin during printing. You will need to use the scale adjustment to fix the issue.
Please note that this feature (scale adjustment) is still a work in progress and we are looking for feedback on how well it works.
Also, you have to make sure your sides of the grid are perfectly parallel to each other during calibration. Use the projector remote's Keystone adjustments to do that.
Monger Designs a.k.a. Monger
http://www.mongerdesigns.com
Junction3d - Official US Distributor for the SOLUS 3D PRINTER
http://www.junction3d.com
Follow us on Instagram!
https://www.instagram.com/junction3d/
http://www.mongerdesigns.com
Junction3d - Official US Distributor for the SOLUS 3D PRINTER
http://www.junction3d.com
Follow us on Instagram!
https://www.instagram.com/junction3d/
Who is online
Users browsing this forum: No registered users and 4 guests