***Totally Stoked!!***
-
mongerdesigns

- Solus Guru
- Posts:1950
- Joined:Sat Apr 25, 2015 5:16 pm
- Location:Los Angeles
- Contact:
Incredible prints. I like your supports. 
Monger Designs a.k.a. Monger
http://www.mongerdesigns.com
Junction3d - Official US Distributor for the SOLUS 3D PRINTER
http://www.junction3d.com
Follow us on Instagram!
https://www.instagram.com/junction3d/
http://www.mongerdesigns.com
Junction3d - Official US Distributor for the SOLUS 3D PRINTER
http://www.junction3d.com
Follow us on Instagram!
https://www.instagram.com/junction3d/

Re: ***Totally Stoked!!***
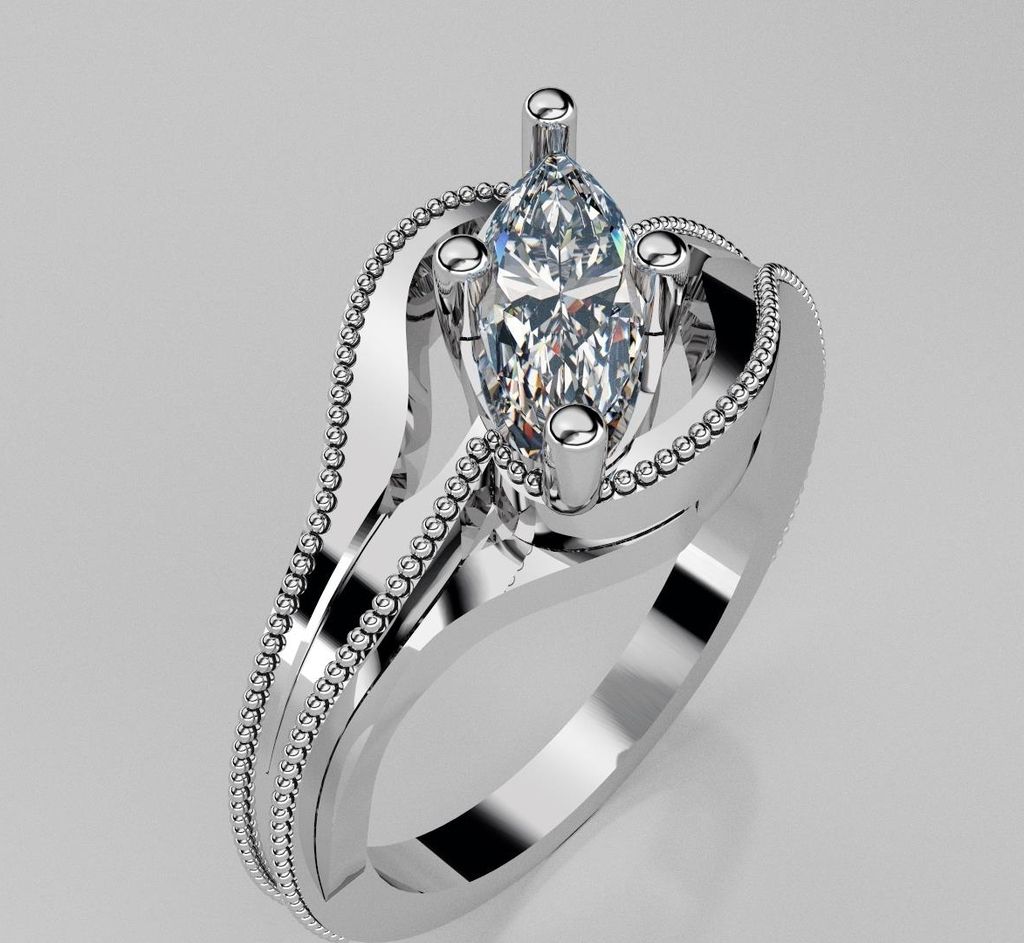
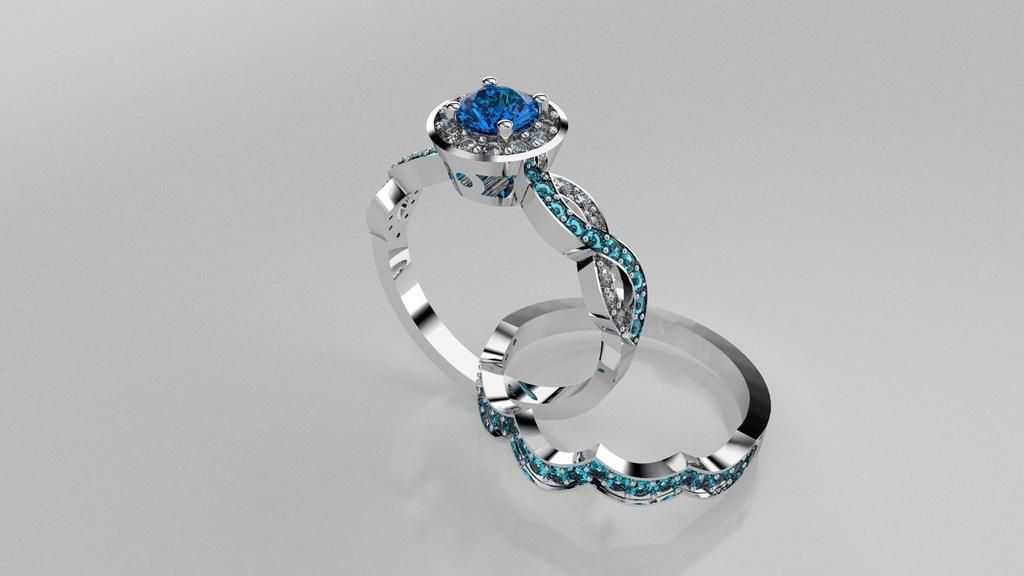
With such small prongs and stones I opted to put a bridge to between 2 prongs and then add one support for both prongs. Easier to clean up and remove that way. Next time I will make a tiny arch on top of the prongs then a support. I think that would even be better. I modified a pair of flush cutters to snip off the tiny bridges and supports. The diamonds for this piece were 1.2mm to 1.5mm. It is really hard to out design the printer. You just have to think differently!! 
mongerdesigns wrote:Incredible prints. I like your supports.
Re: ***Totally Stoked!!***
Last print for 2015!! Happy New Year !!


-
mongerdesigns
- Solus Guru
- Posts:1950
- Joined:Sat Apr 25, 2015 5:16 pm
- Location:Los Angeles
- Contact:
Re: ***Totally Stoked!!***
Very Nice! Happy New Year!
Monger Designs a.k.a. Monger
http://www.mongerdesigns.com
Junction3d - Official US Distributor for the SOLUS 3D PRINTER
http://www.junction3d.com
Follow us on Instagram!
https://www.instagram.com/junction3d/
http://www.mongerdesigns.com
Junction3d - Official US Distributor for the SOLUS 3D PRINTER
http://www.junction3d.com
Follow us on Instagram!
https://www.instagram.com/junction3d/
Re: ***Totally Stoked!!***
These were some tests I did on a piece that was giving me issues with different Support software. finally I decided to do my own supports. That print is the far right print. After doing my own supports it came out perfect. I printed it twice and both times no issues.

These were done with my own supports as well. Zero issues here with these prints.
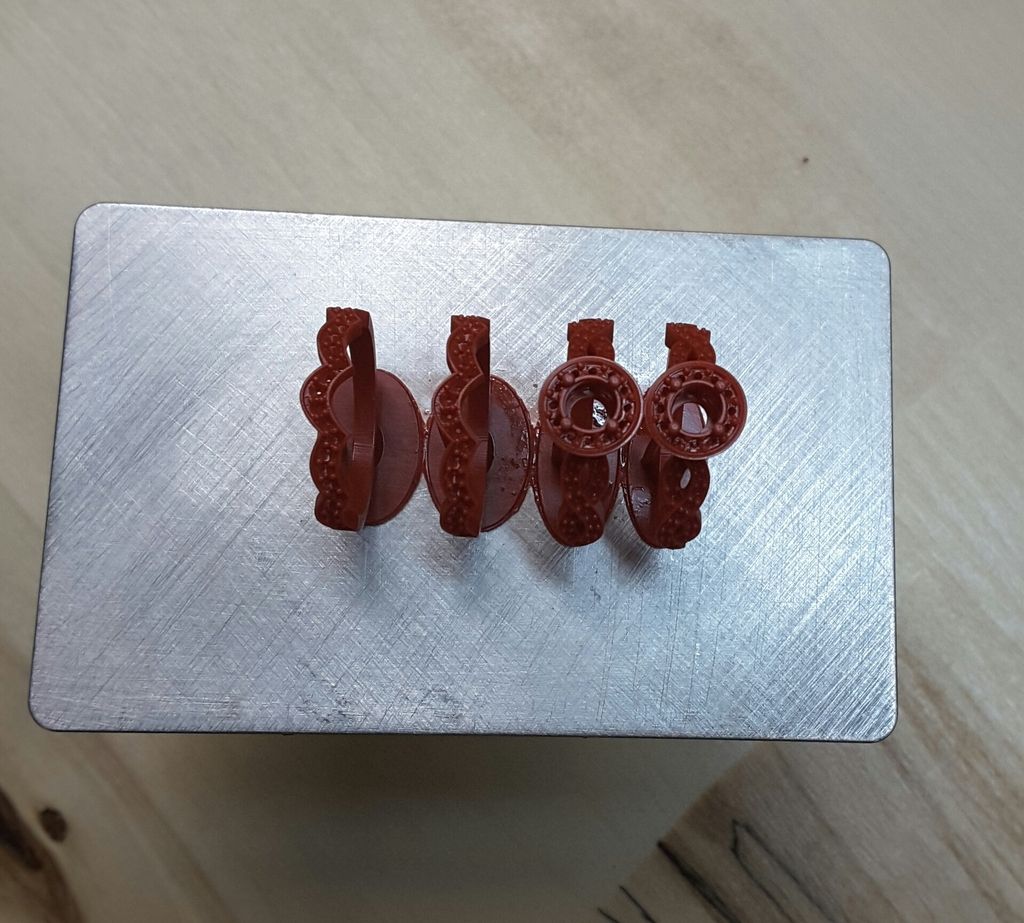
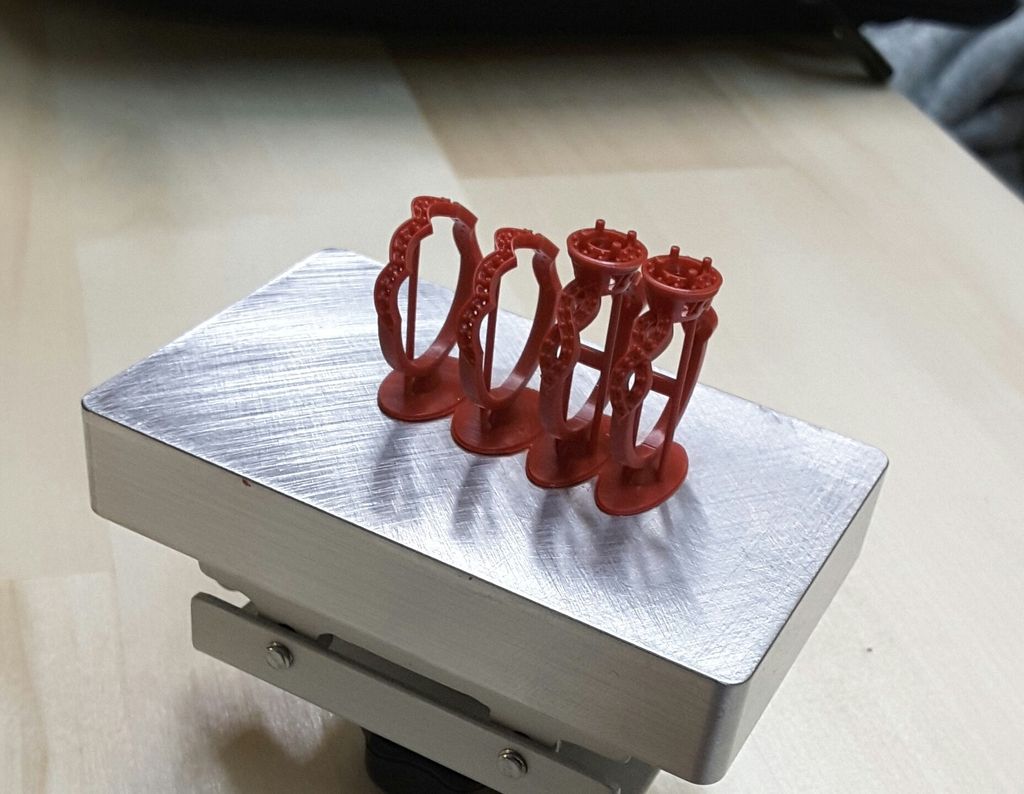


These were done with my own supports as well. Zero issues here with these prints.


-
mongerdesigns
- Solus Guru
- Posts:1950
- Joined:Sat Apr 25, 2015 5:16 pm
- Location:Los Angeles
- Contact:
Re: ***Totally Stoked!!***
Nice! 
Monger Designs a.k.a. Monger
http://www.mongerdesigns.com
Junction3d - Official US Distributor for the SOLUS 3D PRINTER
http://www.junction3d.com
Follow us on Instagram!
https://www.instagram.com/junction3d/
http://www.mongerdesigns.com
Junction3d - Official US Distributor for the SOLUS 3D PRINTER
http://www.junction3d.com
Follow us on Instagram!
https://www.instagram.com/junction3d/
Re: ***Totally Stoked!!***
Thanks Emil. Talked with Bob today and he said you had him going with his new printer.He had just finished a print when I talked with him.
Rolling along!! This is a Diamond and Tanzanite pendent w/hinged bail.

Rolling along!! This is a Diamond and Tanzanite pendent w/hinged bail.


-
toddmichael

- Novice
- Posts:77
- Joined:Sun Jul 05, 2015 4:33 am
- Location:Motor City, Mi
Re: ***Totally Stoked!!***
Curious about your supports and square base attached to the build platform?
Please advise how you accomplished this?
Todd michael
Please advise how you accomplished this?
Todd michael
Toddmichael
Firestorm Cad / Jeweler / Designer
Firestorm Cad / Jeweler / Designer
Re: ***Totally Stoked!!***
Actually the supports are very easy to make. The first thing I do before I think about the supports is to make sure when I am building a piece I keep the way a printer works in mind. There are alot of little things that can screw up a print whether the supports are right or not. One thing to remember about the Solus is that it slices really thin so the slightest negative overhang without support can mess up a print. You actually have to think I guess you can say upside down or the way the piece might be oriented.
That being said the second thing I do is a test STL on the model without supports then send that STL through Netfab just to double check to make sure everything is very fine before the supports. This way I know the model can be fixed if it needs to be.
The next step is to orient the model the way I think it will print the best. I really dont like the bottom of the model to be more than 5mm off the build plate, closer to 3mm is better.
Then I start the supports. I look at the piece and try to determine how few supports I can get away with. There is no need to put supports if they are not needed. To many supports makes for to much clean up. In the short time I have been doing this it seems that any flat area that is parallel to the build plate will need more support.
To make the supports is the easy part. First I save the model then make a copy to do the supports on. I just decide whether the support will be straight or curved and what the diameter might be. I am starting to use smaller diameter supports now that I have a feel for what the Solus can do. You need to keep a few things in mind when building the supports. first I make sure I start my supports @ .10 mm from the zero plane. That way no supports will come though the bottom of the base when I build it at the very end. Then I make sure the support enters the model as close to 90* as possible. This will create a better mesh geometry around where the support meets the model. To make the supports I just draw a straight line or a curved line from .01mm above the base to where I want the support to enter the model. I make sure that it enters the model approximately .30--.50mm inside the model. Once I have the line or curve in the right place I just extrude a pipe with the right diameter with flat capped ends around that line or curve. Remember you can change the dimensions on your support and use them in a different location. It would not be a bad idea to have a file with your supports so you don't have to always make them for every model. Once I have all my supports place on the model I boolean everything together.
Now that the supports and the model are booleaned together I make the base. Normally I make a oval base. It seems that the curved bases work better than a sharp corner base like a square. In the top view I just draw a oval or other shape on the zero plane that encases the model and supports. Then all I do is extrude that shape to positive .5 mm. Then boolean the base to the model and supports.
Now I do a STL then send it to Netfab to check it. You can repair any issues if there are any in Netfab then do a new STL with the repairs in Netfab. I then save that STL into a STL file to send to the printer. I also save my Rhino model with supports in a file.
Then you are ready to print. Good Luck Mark
Re: ***Totally Stoked!!***
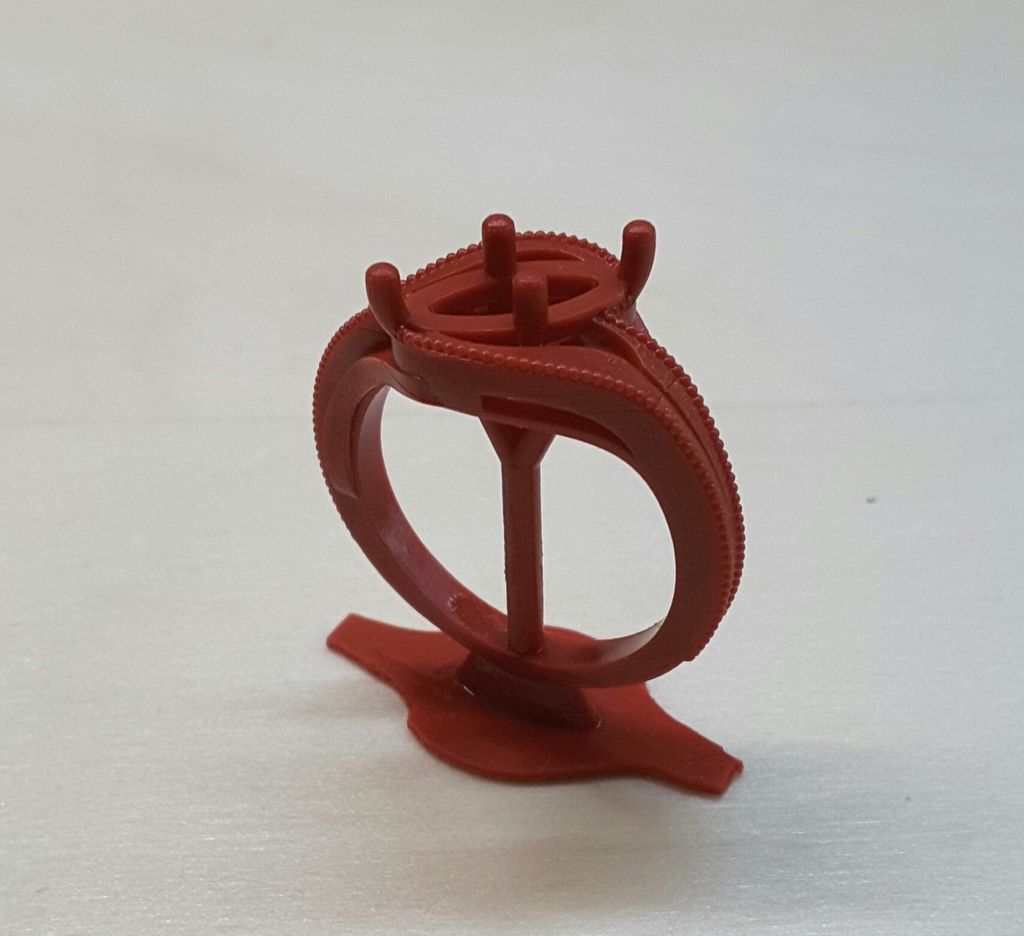
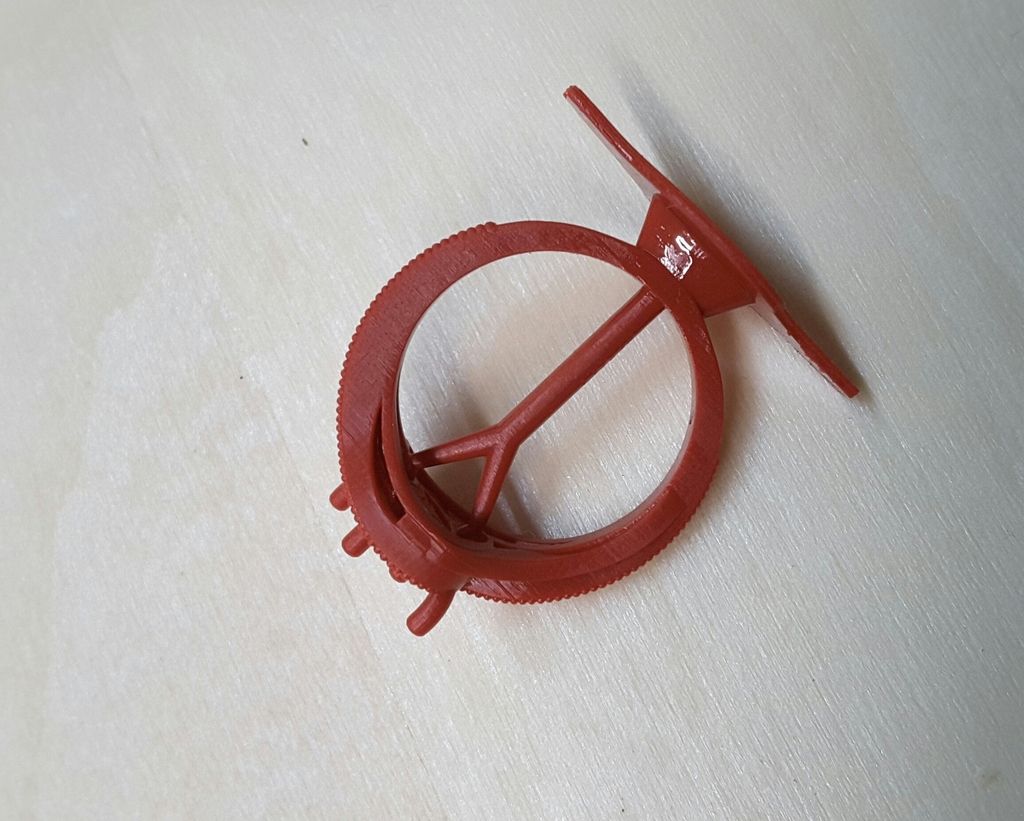
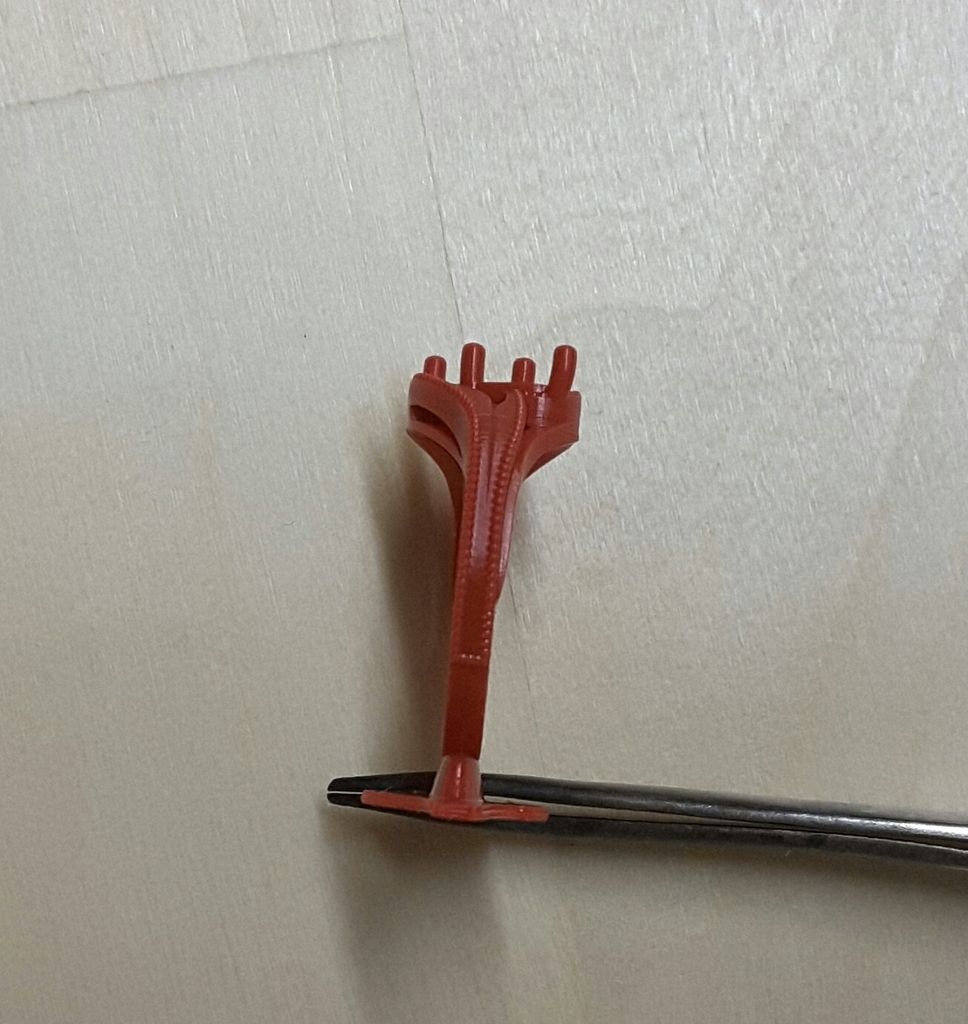
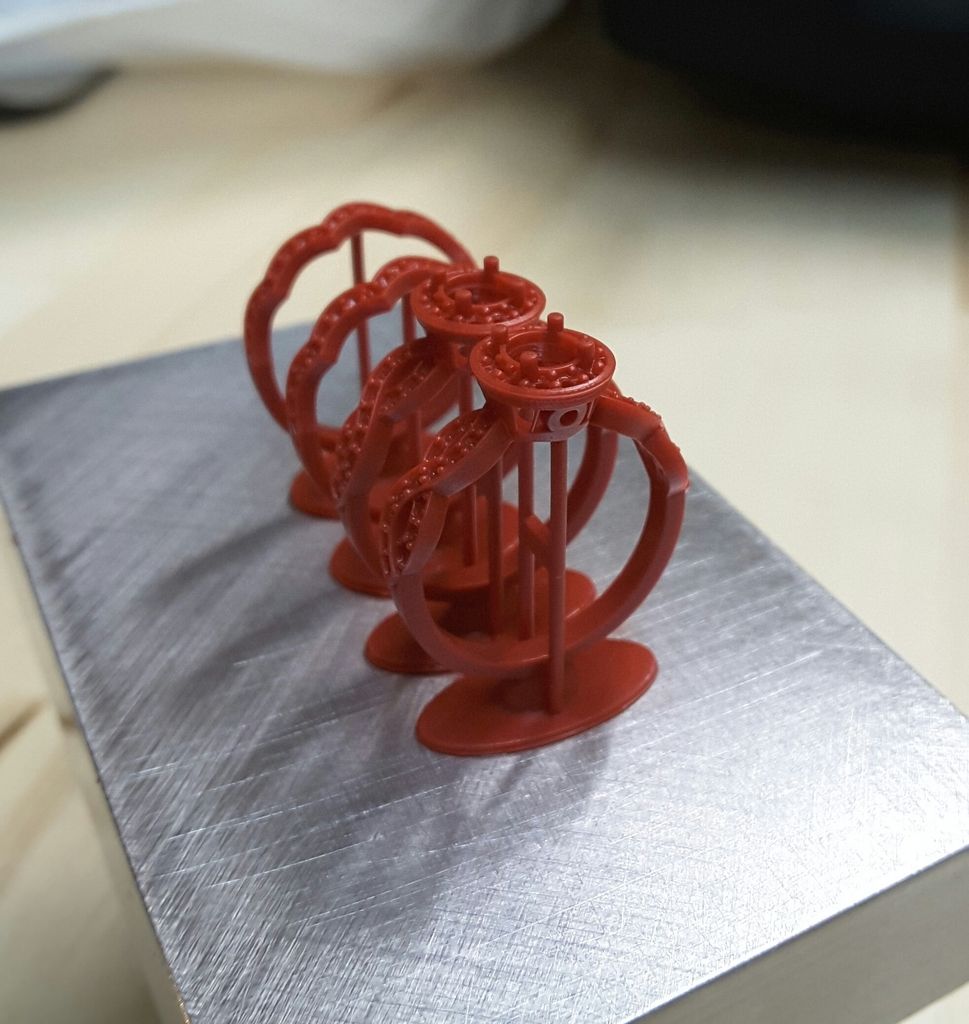
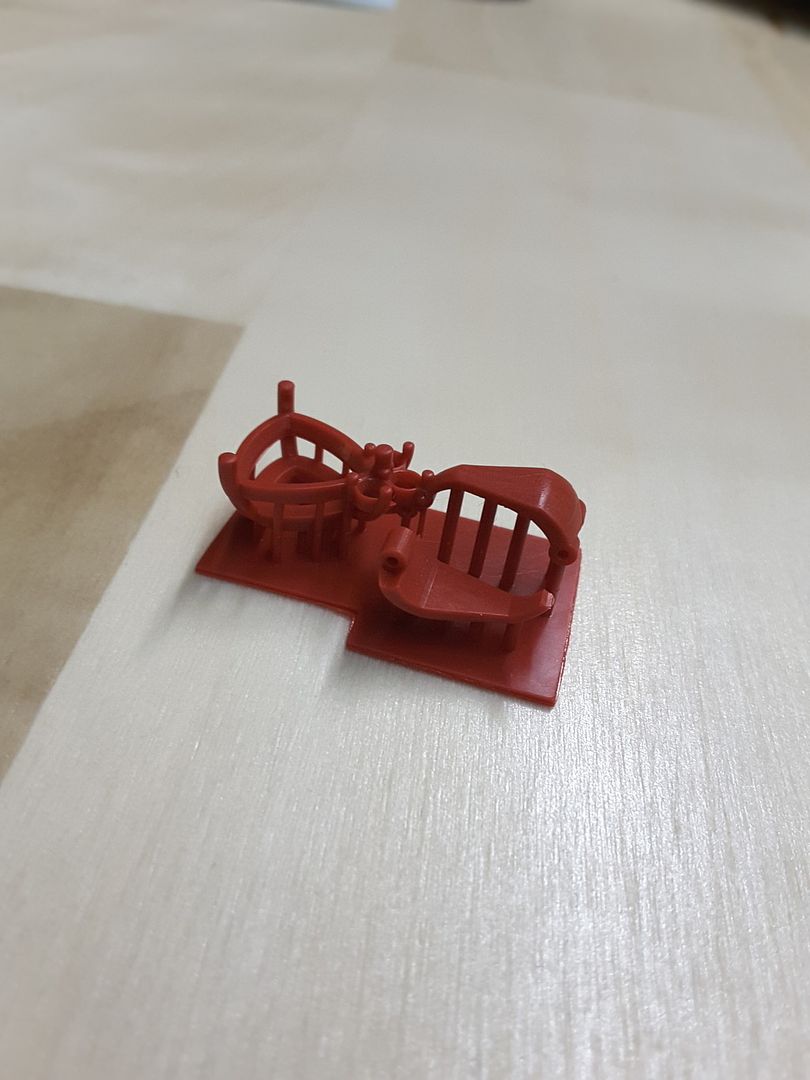
Someone asked me about a few things on my print so I thought I would post a few close up pics of the parts in question.
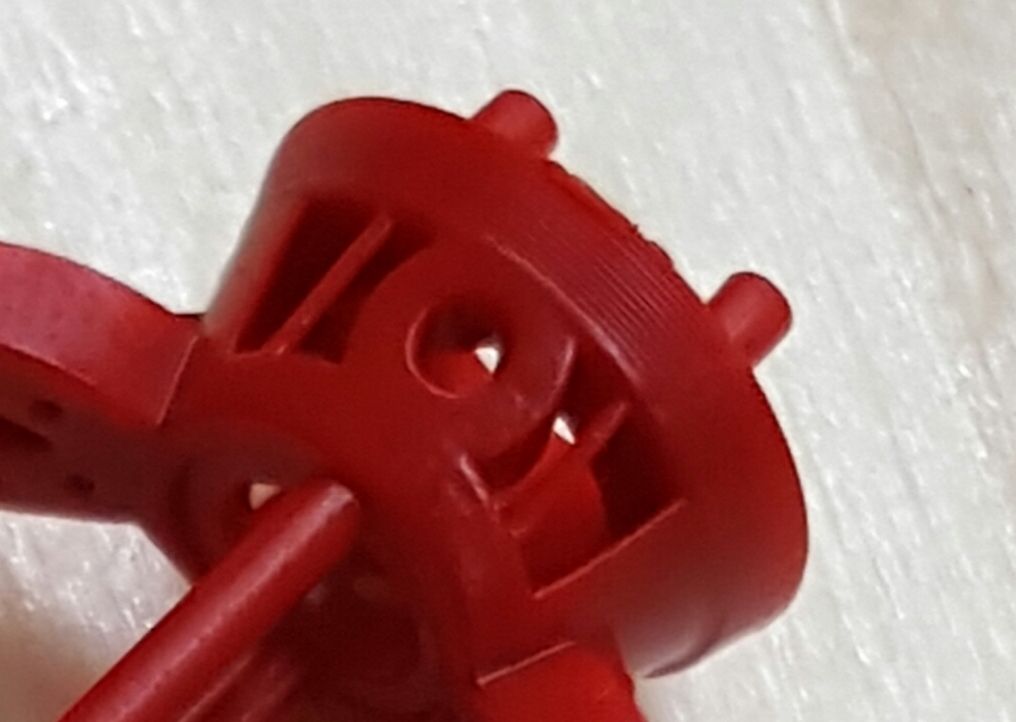
One question was about the tiny supports I use on some of the pieces. I call them micro or mini supports. Instead of adding big supports from the zero plane I will support a part of the model from another part of the model that is already supported or doesn't need support. These supports range from .2 -.5 mm in diameter. The tiny supports are easy to remove with a #11 scalpel or a pair of modified flush cutters. I do these in Rhino or RG and can mirror or copy them to where they are needed. You can see them in this pic. Unlike the larger supports there is no clean up with these tiny supports
These supports (bridges) were .3mm in diameter.
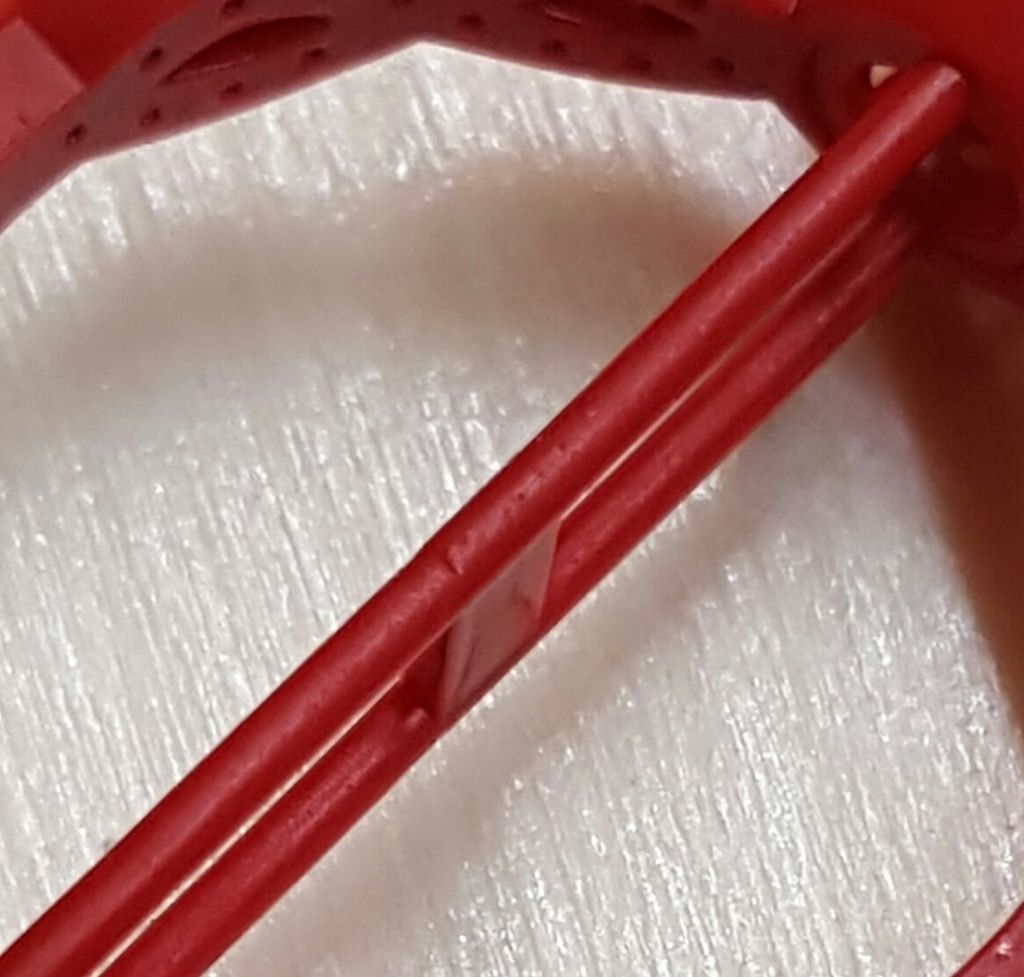
When I am using smaller vertical support I am adding a brace between them to keep them in line. In most cases just one in needed.All of this is done in Rhino or RG.

Who is online
Users browsing this forum: No registered users and 4 guests