Casting Emerald Wax Problems

Discuss casting techniques
User avatar
Archerm
Solus Master
Posts:599
Joined:Mon Oct 26, 2015 1:57 pm
Location:North Carolina
Re: Casting Emerald Wax Problems

Postby Archerm » Thu Jan 12, 2017 2:08 pm

I have never used Plastic Cast with Bandust. I will say that curing is the key to most of the issues. I take great pains curing my Resin models. I flip them to make sure all areas are cured. This means the top ,Bottom, Sides. I also have mirrors in my UV curing device to try and get all areas possible. As Stated in my post I leave the models in My curing can over night after I have cured them in my Melody Susan nail curer. It is also important to clean any resin residue off the prints before curing. I keep a small jar of alcohol in a small unheated ultrasonic for removing resin residue. I then rinse in water with dawn dish detergent then rinse in hot water and then take compressed air to blow them off. Then I cure them with the supports on.
Make sure you are using a stiff plaster mix at 38/100 and make sure you bench set the flasks for at least 6 hours or more before you start your burnout. And yes I do a very fast burnout with the emerald resin. I try to vaporize it instead of letting it sit in the flask and bubble and boil.
I have experimented with button up and button down and see no difference with the emerald resin.

By looking at your photo It looks like one of three things might have happened.
1. You don't have a full cure or you didn't rotate you pieces to cure them on all sides.
2. Your investment mix had two much water in it or you didn't bench set your flasks long enough. (Might be the Bandust I don't know)
3. Your ramp up was to slow.

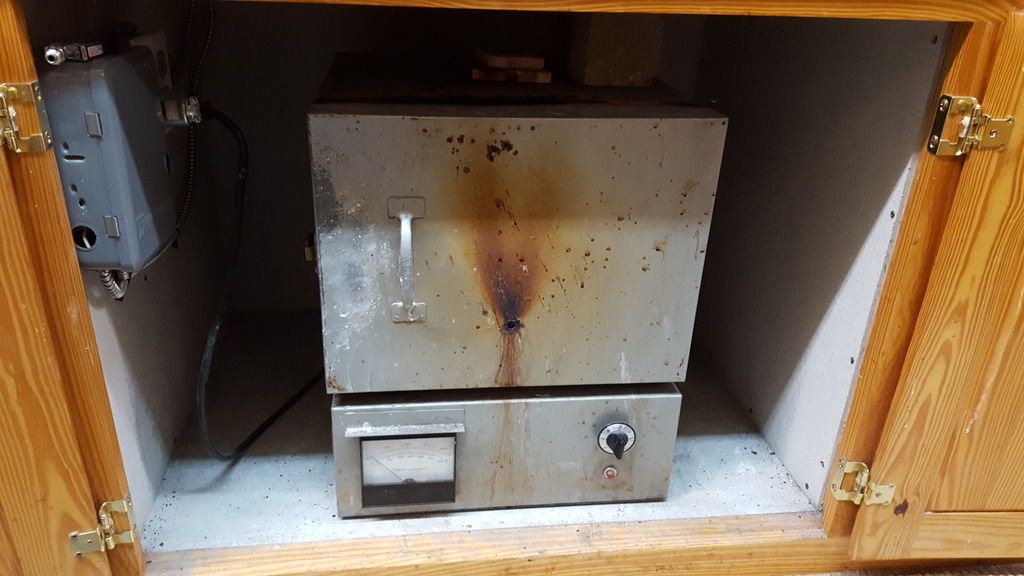
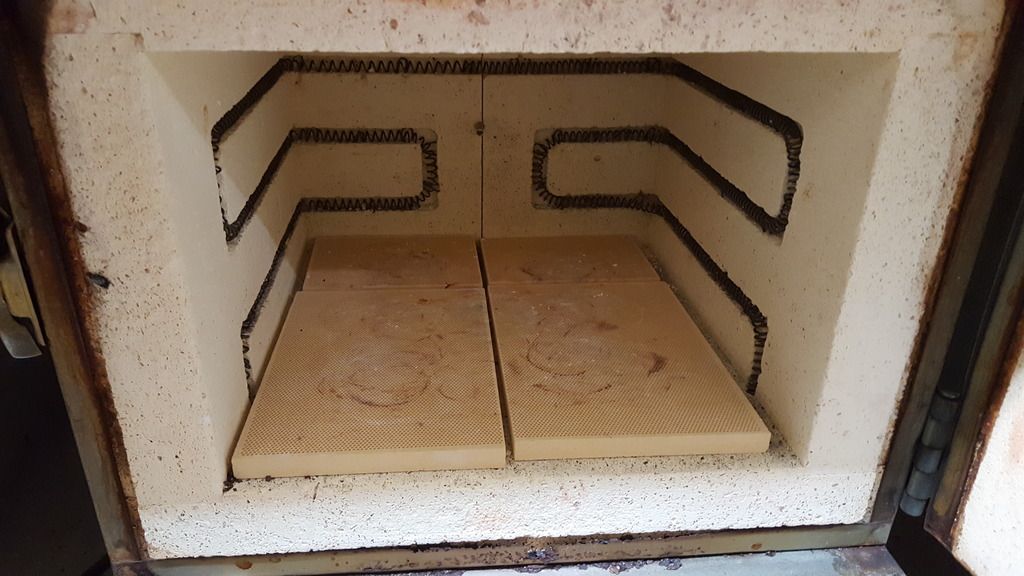
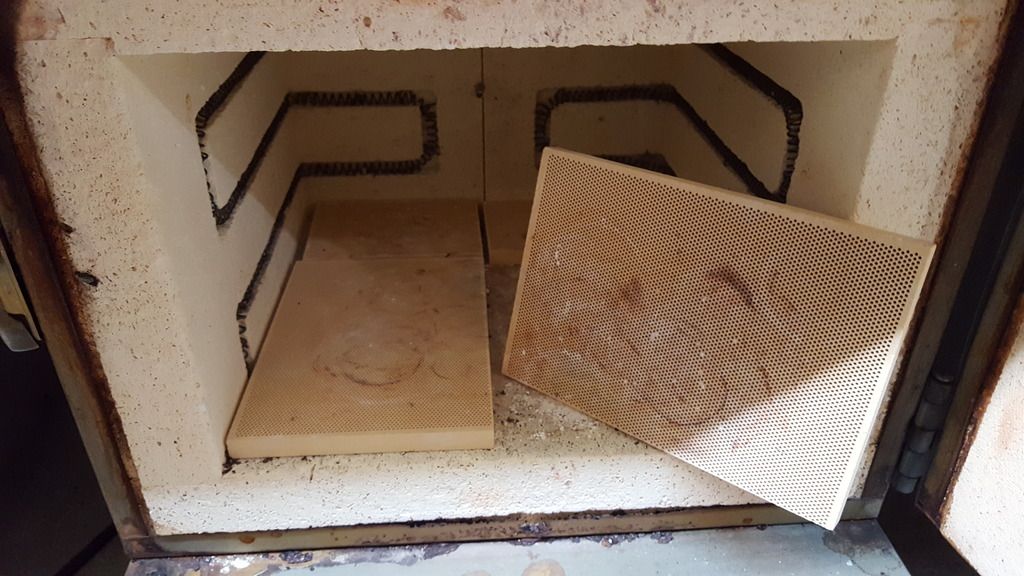
As far as the oven yes it can make a difference. I use a oven that is 30 years old. The inside dimensions are 12x12x9 it has a vent hole in the front and a vent hole in the top. I leave these open. I do have ceramic honeycomb blocks in the bottom. I also have a venting system that pulls the fumes out of the oven area.(Note there is no difference in casting results with the venting system on or off). I would suggest if you dont have any vent holes you should. The two vent holes in my oven are 1/2 inch in diameter.

I have attached a few pics of my oven for you to see. I know someone will ask where the ceramic honeycomb blocks came from. They came from Gesswein. http://www.gesswein.com/p-1383-honeycomb-blocks.aspx

Patience with resin casting is a must. There are really no shortcuts as I have tried them all.

Image

Image

Image

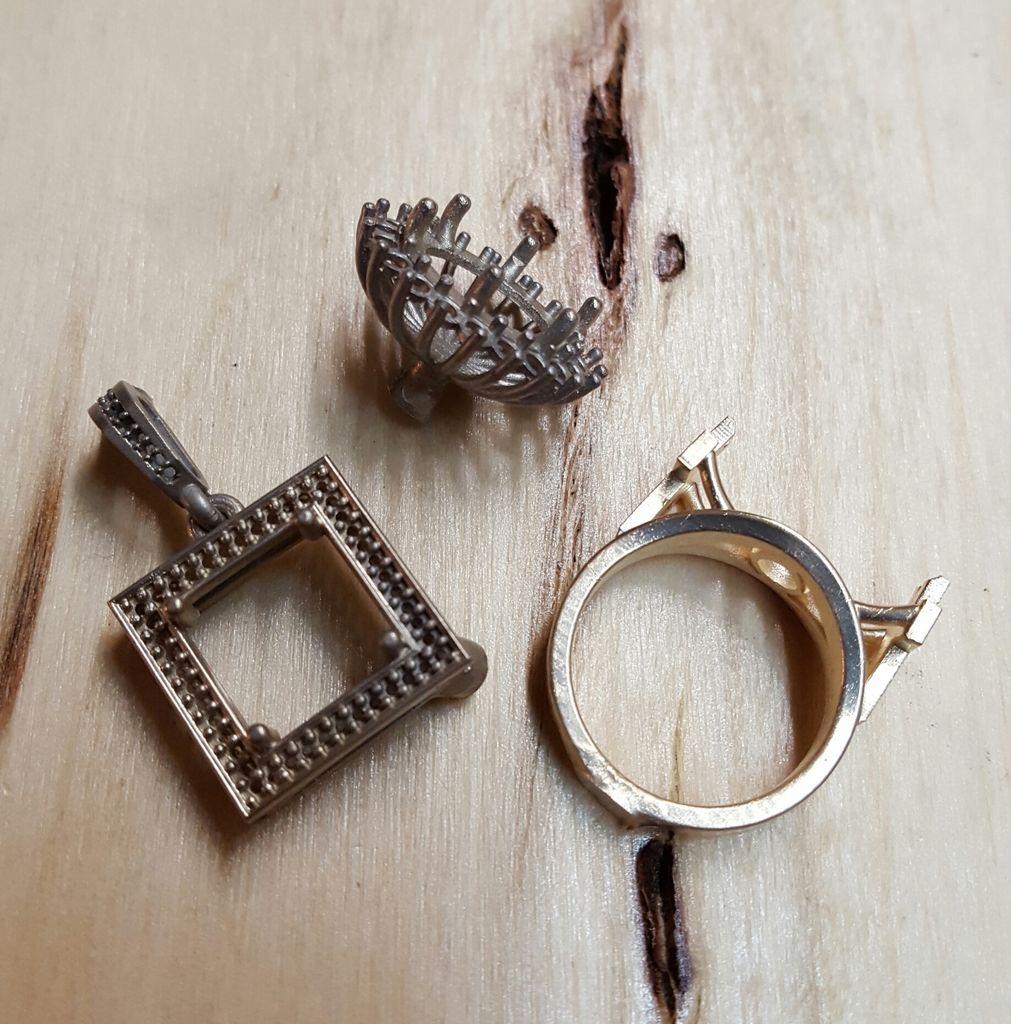
A few print castings from yesterday.
Image
User avatar
jeweltool
Novice
Posts:59
Joined:Wed Jul 01, 2015 8:57 pm

Re: Casting Emerald Wax Problems

Postby jeweltool » Thu Jan 12, 2017 5:41 pm

Very good casting info.

Nice pictures as well.

Thank you very much for the posting.
User avatar
rkundla
Solus Master
Posts:308
Joined:Sat Jan 09, 2016 6:01 am

Re: Casting Emerald Wax Problems

Postby rkundla » Thu Jan 12, 2017 7:56 pm

Negative flaws would typically indicate inclusions, like ash or broken investment.

Having enough combustion air in the kiln during the high temp part of the burnout is vital.

Also, if you do point the button down, only do so during the 300°F phase to eliminate the wax sprues. Emil is right that resin does not liquefy like wax, it will slump then it will burn. Keeping the button up allows the fumes/gases to escape and not try to permeate through the investment, which in some instances cause breakdown of the surface.
User avatar
rkundla
Solus Master
Posts:308
Joined:Sat Jan 09, 2016 6:01 am

Re: Casting Emerald Wax Problems

Postby rkundla » Thu Jan 12, 2017 8:02 pm

According to R&R, there is no difference in behavior between the BANDUST and non-BANDUST versions of Plasticast.

As we all know, mixing a batch of investment is not the same as cooking. The chemistry is very precise to get the effect you expect. If you don't follow the recipe when mixing investment, you will more than likely get crummy results. ;-)

I am trying for the first time casting 14k white gold and it is nothing like the sterling silver I typically use when casting. Add concerns about resin curing, temperature of the flask/metal, spruing and I feel like I am back to my first attempt at casting silver. :o
User avatar
nzfinescale
Novice
Posts:61
Joined:Fri Apr 22, 2016 5:13 am

Re: Casting Emerald Wax Problems

Postby nzfinescale » Thu Jan 12, 2017 10:03 pm

Hi Mark

Can you expand on Emerald clean up and cure please?

Your prints look great, but mine are mediocre (even though my Proto prints are superb).

I've seen advice to wash with alcohol, avoid alcohol, use >90% alcohol etc. So if you wash with alcohol, what % do you use and for how long?

There is also discussion of the 'white film' that seems to be a function of alcohol/water. I've seen it, but your prints don't show any sign of it.

We don't have Dawn locally, but how much detergent do you use in your wash?

You don't say you cure under water - but this seems to be common practice by others. Any thoughts on that?

Lawrence
User avatar
Archerm
Solus Master
Posts:599
Joined:Mon Oct 26, 2015 1:57 pm
Location:North Carolina

Re: Casting Emerald Wax Problems

Postby Archerm » Fri Jan 13, 2017 1:34 am

Lawrence I can expand some for you.

First off I have found at least with the emerald, my projector, and printer i have to adjust the buffer to 2 or 3. It seems to print the emerald better with these buffer settings. The lighter pieces I set the buffer to 2 and the heavier pieces I set to 3. I believe that every projector is a little different and a little experimenting is in order. I know some might say it doesn't matter But I never leave the resin in the trays after printing. I dont like mixing the resin in the vat because of the film. Also the emerald tends to have a few small floaters now and then so I like to strain my resin before every print run. I pour the used resin in a light proof jar then strain it before the next print.
I keep everything spotless and try to keep a very clean environment. I have a routine I follow religiously every time I print, clean, cure, invest and cast and I don't deviate from this routine.
1. I always check my film before I print. I make sure it is very clean and not to loose.
2. I then always mix my resin in the jar with a silicone spatula.
3. After mixing I pull up 40 mls using a large syringe I then strain the resin as I put it in the vat.
4. Note: My film is installed as Emil shows in his video. I would rather have the film a hair to loose than to tight. If your prints are not printing all the way or stop printing chances are the film is to tight.
If your prints are printing all the way but show heavy layer lines chances are your film is stretched badly and needs to be replaced. I print a lot and I can normally use one piece of film for about 3 months.
5. I always clean the quartz before every print. Resin on the bottom of the vat or on the quartz is a print killer. I use 90% Isopropyl to clean them.
6. When I install the vat on new film I tighten the screws down all the way then back them off evenly till the vat starts to feel loose or no tension on the thumb screws. when this happens I then re tighten the thumb screws 1/2 a turn.
7. After the print is complete I clean the prints in a small jar of 90% Isopropyl in a small ultrasonic NO HEAT for about 15-30 seconds no longer.
8. I then rinse them in dish detergent and water mix in a Ziploc bag, this will remove any resin residue. I then rinse the prints under hot water for about 30 seconds no longer. You can just use hot water and no detergent if you don't have it.
9. Then use compressed air to dry the prints. One note I leave the supports on all the way through the cleaning and curing process.

The curing process.
1. After the prints are dry from cleaning I put them in a UV nail curer (NO WATER OR OIL) for 12-1 minute cycles making sure to rotate and flip the prints after 2 one minute cycles. Both my UV curing devices have mirrors in them to reflect the UV light to as many areas of the prints.
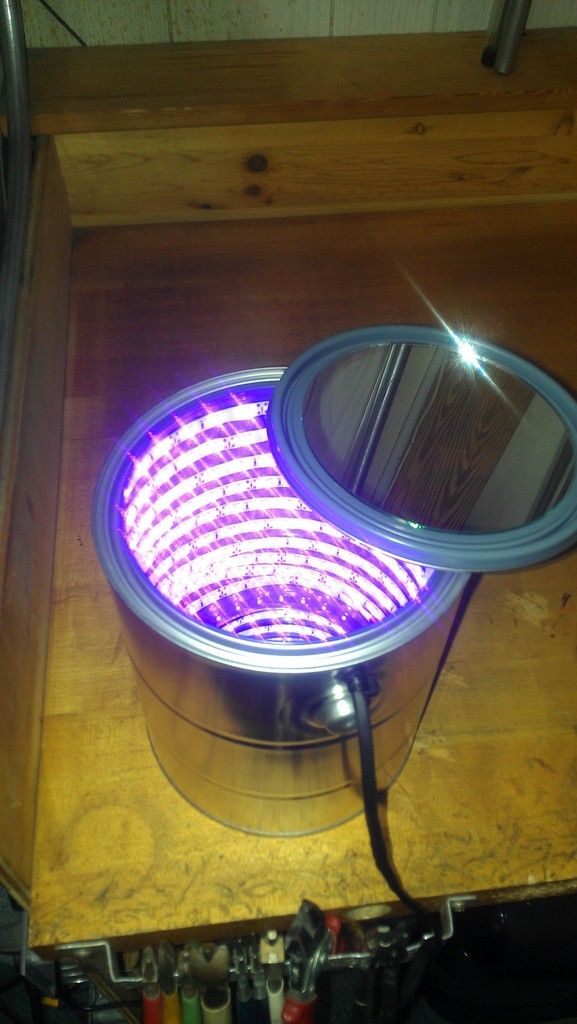
2. I then put them in my can UV curer over night for a final cure. (NO WATER OR OIL)
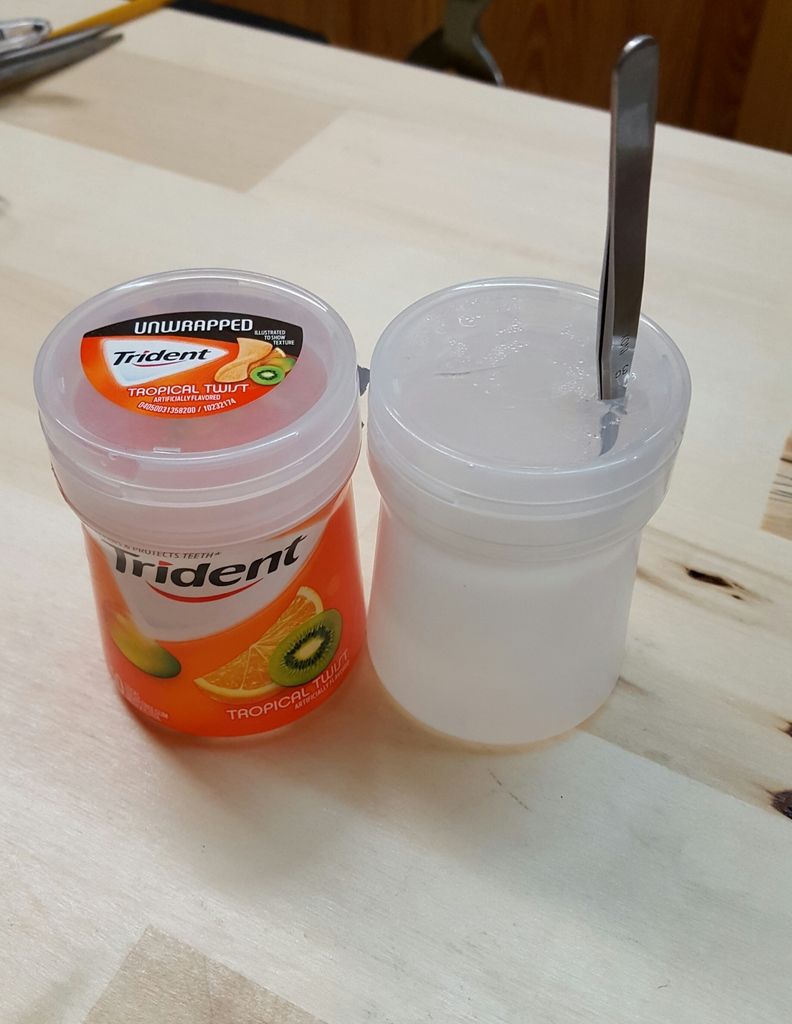
3. Next morning I place the prints in my fancy distilled water container and fill half way with distilled water. I then microwave them for around 2min 30 seconds to 3 minutes. I then let them cool and refill with distilled water and repeat the microwave process two more times.
4. Dry off with compressed air.
5 Clip off supports touch up and you are ready to invest.

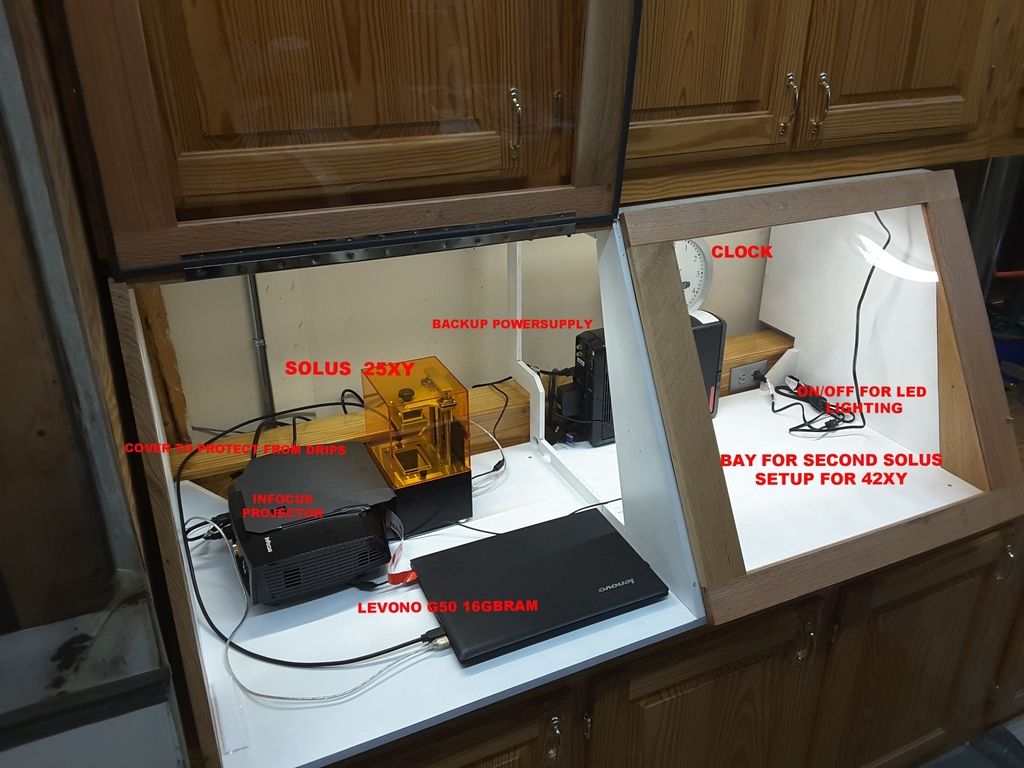
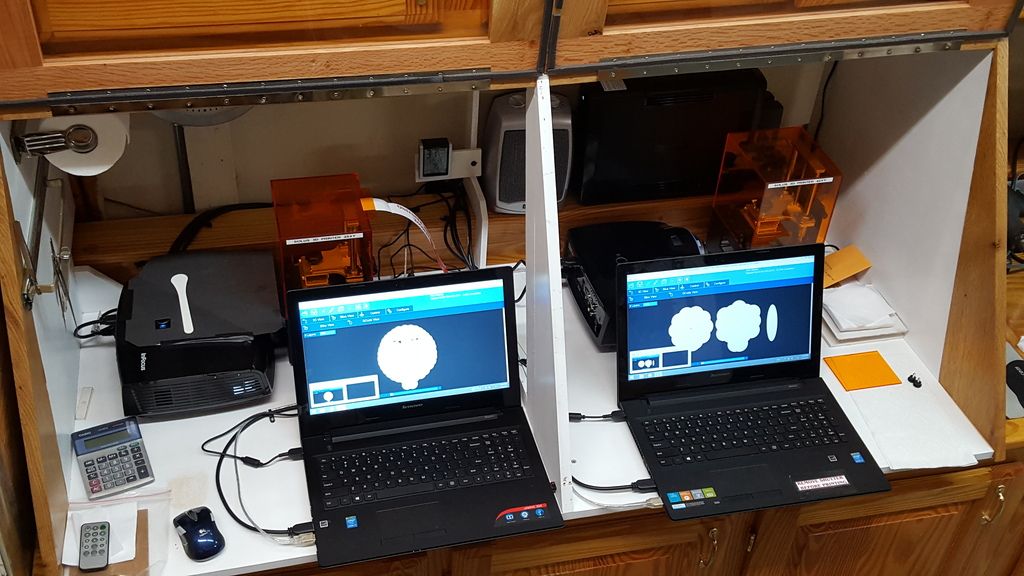
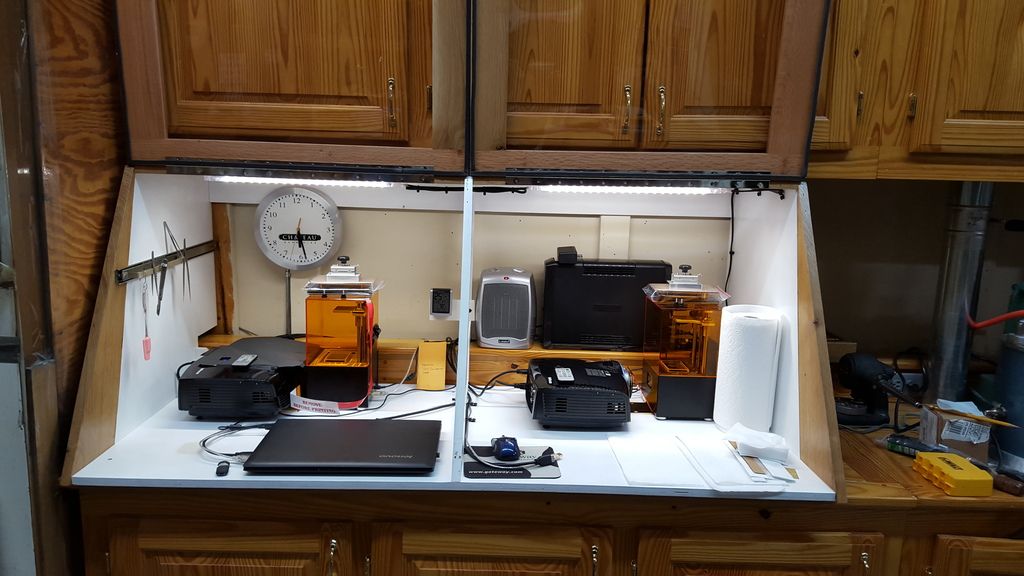
The 25xy and 42xy printers home.
Image

Image

Image

Can UV curer.
Image

My fancy print microwave container!
Image
barth
Novice
Posts:54
Joined:Sun Nov 27, 2016 5:52 pm

Re: Casting Emerald Wax Problems

Postby barth » Fri Jan 13, 2017 8:15 am

What's the purpose of the buffer?
User avatar
nzfinescale
Novice
Posts:61
Joined:Fri Apr 22, 2016 5:13 am

Re: Casting Emerald Wax Problems

Postby nzfinescale » Fri Jan 13, 2017 10:17 pm

Thanks for posting that very full response Mark.

I'm going to digest that and make some changes to what I do.

Lawrence
wawatobi
Novice
Posts:71
Joined:Tue Nov 24, 2015 9:56 am

Re: Casting Emerald Wax Problems

Postby wawatobi » Mon Feb 13, 2017 10:06 pm

I don't think your burnout cycle is long enough. my burnout takes 9 to ten hours with three hours at 1350. If i am casting something where i can't afford to make a mistake i use phosphate bonded investment. If you're only taking 1.5 hours to 1400 F I think the expanding resin is causing bits of the investment to break free and these bits are lodging in your casting. the investment is near to it's breakdown point at 1400 degrees so you need to hold at 1200 for an hour to burn most of the resin before you go to maximum temp. I'm taking 5 hours to get to the maximum temperature. Holds at 350,700,900, 1200. Alos I always use a tree when spruing to lessen the possibility of slag being draged into the patterns. Somebody correct me if iyou disagree but ash residue resultsin shallow roughing of the casting surface, incompletely burned resin makes deeper inclusions that are angular or at least well defined, investment breakdown leaves rough surfaces all around the model and the model can't be saved. Using plasticast I seldom have perfect castings but any inclusions are generally few and are able to be repaired with PUK welder. I am using emerald exclusively until something better shows up. I haven't tried yellow because of the likelyhood of more misprints.
User avatar
rkundla
Solus Master
Posts:308
Joined:Sat Jan 09, 2016 6:01 am

Re: Casting Emerald Wax Problems

Postby rkundla » Tue Feb 14, 2017 3:53 am

I will post my method just to provide another datapoint for consideration:

B9 Emerald Resin

1. Put fresh print in beaker with 90% isopropyl alcohol (heavily used) and ultrasonic for 180 seconds (Harbor Freight Ultrasonic machine)
2. Pour alcohol back into container, clean out beaker and fill with 90% isopropyl alcohol (lightly used) and ultrasonic for 180 seconds
3. Pour alcohol back into container and use air compressor to blow off remaining isopropyl alcohol residue
4. Put print in beaker, cover with RODI water and put on turntable under UV curing lamp (high wattage, not sure of exact measurement) for 4 hours
5. Remove print from water and use air compressor to blow off remaining water residue
6. Use jewelers saw and xacto knife to cut off supports and file/sand to desired shape
7. Put back under UV lamp for 30 minutes in air to re-cure exposed surfaces
8. Let air dry for at least 6 hours

I cast mostly in 2-1/2" x 2-1/2" (or 3") flasks and in this case us Stuller Sterlium+ silver

9. Mix R&R Plasticast at 36:100 ratio using RODI water at room temperature (64-68°F) using standard directions
10. Let flasks harden overnight (6+ hours)
11. Start Paragon SC3 electric kiln with single brake line tube/aquarium air pump at 300°F (1200°F ramp), insert flask button up, for one hour
12. Move to 700°F (1200°F ramp) for 2 hours (lots of fumes at this point)
13. Move to 1350°F (1200°F ramp) for 3 hours (no more fumes)
14. Move to 900-1000°F (1200°F ramp) for at least one hour (set for 8 to make sure I have time to get back to it)
15. Lightly vacuum flask using shop-vac in case of any fine debris

Centrifugal casting, acetylene/air torch melt and here are my last results, I think pre-pickle.

Image

It was a nice and clean casting of some medium-heavy rings. No porosity, but some very minor surface defects that will come out during finishing. Part of my logo was filled in on an inside ring band, but that happens a lot so I think it is an issue with the mechanics of my polysurface model from Rhino.

Who is online

Users browsing this forum: No registered users and 103 guests